 |
 |
 |
|
The piece below demonstrates the progress of a miniature painting from start to finish and is accompanied by a brief description for each step. Because each painting is unique, I approach every one differently. There are times I begin with the background, while with others the main subject may be my starting point. In this section of Available Miniature Paintings and in the Commissioned Miniature Paintings there are several other demonstrations. If you wish you may visit each one to see the many different ways I develop my paintings; just look for the “click HERE” feature at the top of each page. My medium is acrylic paint, and my brushes range from #1 down to #0000. Most miniaturists use some sort of magnifier as a way to see and work on minute detail. Reading glasses, plus a simple hand held magnifying glass, work best for me. The images below have been enlarged to show the details of each progressive step. Reaching for the Sun: |
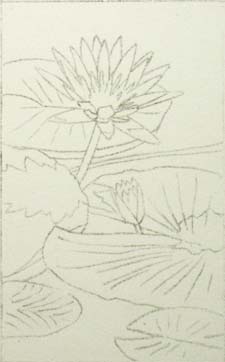 |
1. For miniatures I often work on Strathmore® Illustration Board, 500 series. This archival product is 100% cotton rag with an almost indestructible surface. |
 |
2. Because I wanted the water blended from light to dark, I knew it would be easiest to paint it in first and then work on the lily pads afterwards. In order to “hold” my whites, I masked the subject out with a liquid masking fluid. This liquid rubber is simply applied with a brush, but at times it can be rather tricky, especially if it starts to dry where you’re working. |
 |
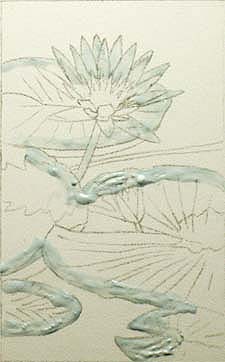
3. Once the masking fluid dried I washed in the background color. The paint was applied in many thin layers in order to prevent any streaking and to build up the color. Notice how I was able to paint right over the mask without needing to concern myself with having to paint around each flower petal or lily pad. |
 |
4. After I was satisfied with the gradation of the color and the color itself, I removed the mask with a rubber cement pickup. |
 |
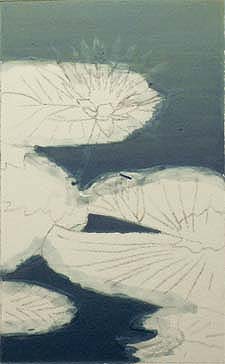
5. After the water was laid in, I roughed in the lily pads. The more I worked, the more I became concerned that the blue was too bold for my pink and silvery frame. When I placed the frame over the painting my suspicions proved to be correct -- the blue was way too strong, which necessitated an adjustment. I decided to match a color from within the frame that would complement everything equally. I mixed it up and carefully painted it over the blue. I began by laying my new color down opaquely at the top and thinned it out as I moved down the painting. In order to introduce this color successfully, I had to repeat steps 2, 3 and 4 from above. |
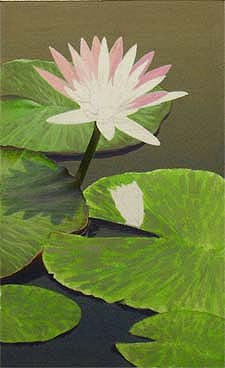 |
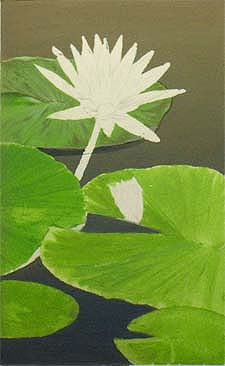
6. When applying a background before a subject, and especially when I work with a liquid mask, I never quite paint the mask all the way out to my pencil marks; I allow the background to come in slightly onto the subject. I do this because the mask leaves a very ragged edge, as was the case with the lily petals. I cleaned up these edges by using a very opaque white paint before I added any color to my subject. |
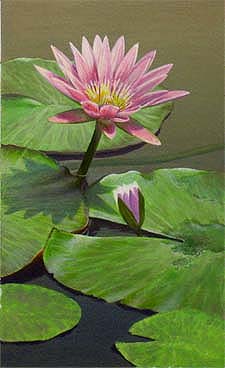 |
7. Once my edges were cleaned, I applied the color and worked from back to front and warm to cool. After the flower was done and the lily pads grounded, I moved on and finished the center pad. Before I completed the foreground pads, I felt it necessary to work on the flower bud. It’s difficult to see, but the bud is only partially painted in this example. |
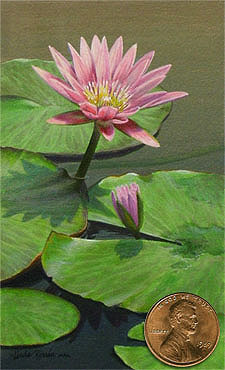 |
8. When the bud was finished I finally felt comfortable to work on the foreground lily pads. After completing these, I moved around the painting and strengthened up some of the darker values and made a few minor color adjustments. Lastly, I added the flower bud shadow, my whitest whites, and my signature. (The penny is for scale.) |
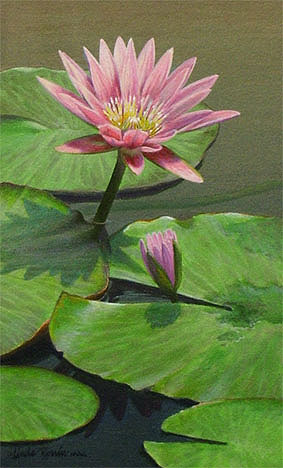
Reaching for the Sun -- (Enlarged)
Acrylic Traditional Miniature
Size: 3 5/8 x 2 1/4”