 |
 |
 |
|
The piece below demonstrates the progress of a miniature painting from start to finish, and each step is accompanied by a companion comment. My medium is acrylic paint, and my brushes range from #1 all the way down to #0000! Most miniaturists use some sort of magnifier as a way to see and work on minute details. Reading glasses plus a simple hand held magnifying glass work best for me. Although I worked from a photograph that I took in Vermont, it was physically being at this location which helped me recreate the impression of the moment. (To see more demonstrations, look for the "Miniature in the Making, Click Here" feature located at the top of my pages in the "Miniature Paintings Gallery, Available for Purchase" and the "Miniature Paintings Gallery, Commissioned Miniature Paintings "sections.) Crayfish Cravings -- Raccoon: |
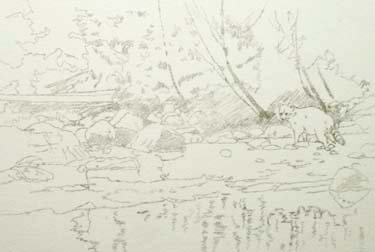 |
1. Before I began to paint, I transferred my original pencil drawing to the board. |
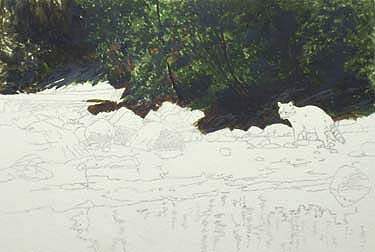 |
2. For the wooded background, I decided in order to create the mood of early evening it would be best to work from dark to light. I began by blocking in the slope of trees with rather Impressionistic brush strokes. Here I set my dark and medium values along with their overall hue. Very few details were introduced at this starting point. |
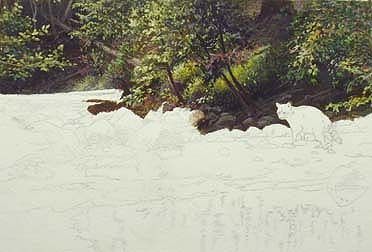 |
3. Knowing in my mind exactly where I was going with this piece, I developed the background detail by first adding some details to the darkest areas. As I moved to my medium values, I brought in my light values as well, enlivening the colors along the way. I worked from dark to light as well as light to dark and repeated this process until I was satisfied that everything worked in harmony. |
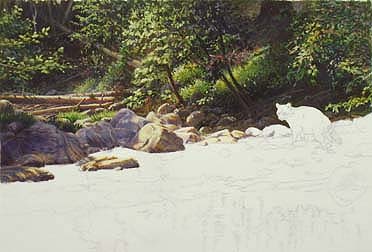 |
4. As I moved to the mid section of this mini, I not only had to maintain correct values, but because of the shadows on the rocks, I had to concern myself with warm and cool colors as well. I worked from back to front and right to left. Note that my light source has now become more discernible with these additions. |
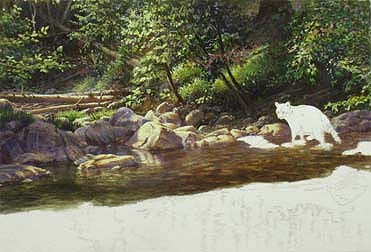 |
5. With most of the rocks painted, I moved down into the stream area. I left white shapes for the rocks nearest the raccoon only, because it was easier to paint them and their reflections after the water was completed. |
 |
6. Once the transparent part of the stream was finished, I filled in the missing rocks nearest to the raccoon. I then pursued the foreground reflections and added a bit of motion to the rather still stream and left additional white space for more rocks. |
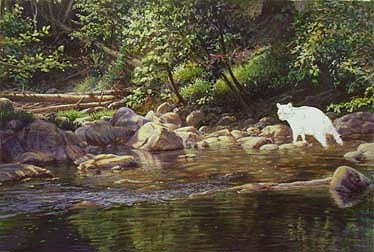 |
7. I added some highlights where the stream glides over a small underwater ridge. I have also now completed the rocks and their reflections which appear above the waterline in this same area. |
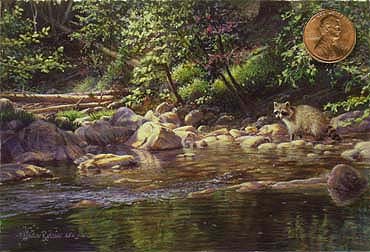 |
8. At long last I painted my critter, refined some overall details, and added the most important highlights. When I was satisfied there was nothing more to do, I added my signature. (The penny is for scale.) |
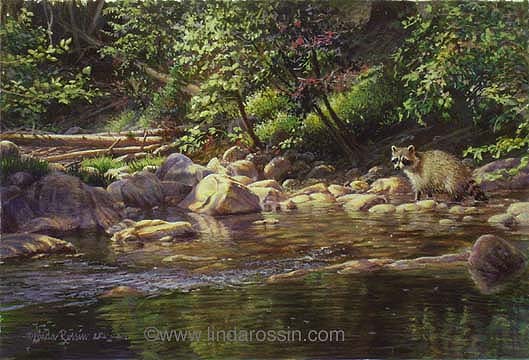
Crayfish Cravings -- (Enlarged)
Raccoon
Acrylic Traditional Miniature
Size: 3 x 4 1/2”