 |
 |
 |
|
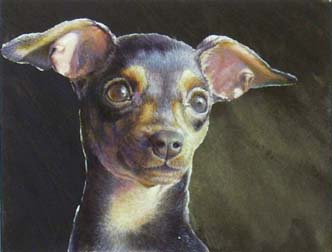
People always want to know how I create my miniatures. With the convenience of the internet I can now show you exactly how it’s done! The piece below demonstrates the progress of a miniature painting from start to finish and is accompanied by a brief comment for each step. My medium is acrylic paint, and as you can imagine, my brushes are very tiny. They range from #1 all the way down to #0000. The mini below was painted using just one brush, a #00 with an excellent point! Another tool most miniaturists use is a magnifier. These come in all shapes, sizes, strengths and models. A simple hand held magnifying glass works best for me. Although I worked from a photograph for this painting I didn’t just simply copy it. I made alterations to improve on the attitude, composition, values, and I compensated for camera distortions. The images have been enlarged to enhance the details of each progressive step. Enjoy! (To see more demonstrations, look for the "Miniature in the Making, Click Here" feature located at the top of my pages in the "Miniature Paintings Gallery, Available for Purchase" and the "Miniature Paintings Gallery, Commissioned Miniature Paintings" sections.) Tinkerbell: |
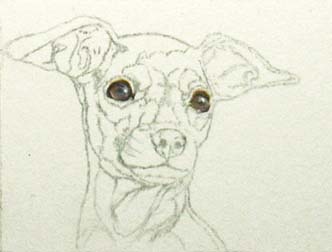 |
1. Note that the eyes appear to be quite finished. This is the way I prefer to work. Having a strong understanding of values along with a firm concept allows me to paint in this manner. |
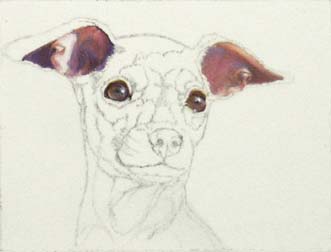 |
2. After painting the eyes, I always move on to the interior of the ears. |
 |
3. Once the ears were defined ,I moved down along the area of the face in shadow. This shadowed side included the development of my cooler colors and darkest darks. Although this area may be dark, if you look closely you’ll see that it also contains colorful reflective light. |
 |
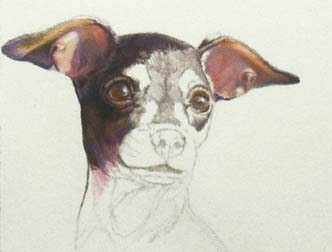
4. In this step I moved over to the illuminated side of the face. Here I introduced my warm tones as well as the sheen of the fur on the forehead and across the bridge of the nose. |
 |
5. I continued to work down the face a little section at a time, taking each area almost to finish. You can see some of my underpainting peeking through on the shadowed side of the neck and under the chin. |
 |
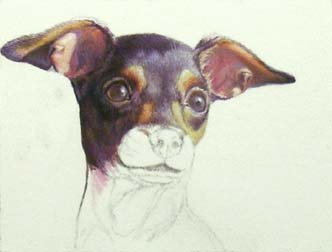
6. While painting in the neck and upper body, I decided an adjustment to the shoulder was necessary in order to emphasize the dog’s very alert attitude. This was done simply by changing the shoulder angle. |
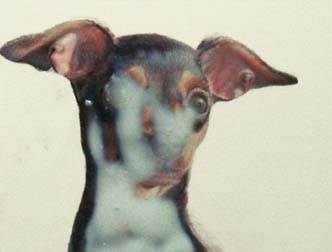 |
7. There is nothing wrong with this picture. When I want a rather simple, yet spontaneous background, I’ll mask out the main subject using a liquid frisket. What you’re seeing is the light blue masking fluid in various stages of drying. This product goes down opaque and dries clear, but retains a cool cast. |
 |
8. I should also mention that before I begin a painting I tape the outer periphery with a special clear removable plastic tape. Any extra brushwork that makes it’s way on to the tape (as shown) wipes right off with a moistened Q-tip! |
 |
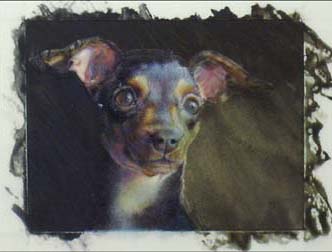
9. The liquid frisket has been removed, but it has left a harsh white jagged line between the subject and background. To remedy this problem I had to marry the two. This was carefully done by filling in the white space with the background color and making it delicately meet the subject. |
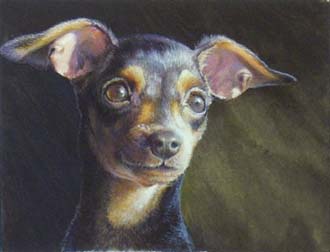 |
10. I was now ready to place the eyebrows, whiskers and most important highlights. |
 |
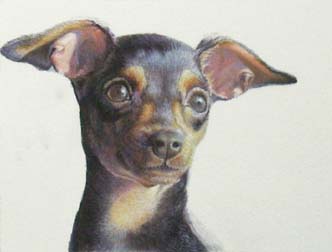
11. With everything done to the best of my ability, I added my signature! (The penny is for scale.) |
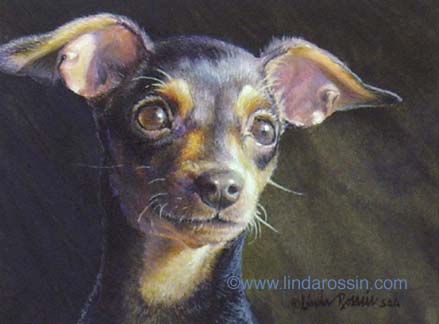
Tinkerbell -- (Enlarged)
Acrylic Traditional Miniature
Size: 1 7/8 x 2 1/2”